Small kitchens don’t have to feel cramped. An open design approach breaks down visual barriers and makes every square foot work harder, turning a tight galley or U-shaped layout into a surprisingly functional cooking and gathering space. The key is balancing openness with storage, flow, and light, all while keeping the design honest about what a small footprint can realistically handle. Whether working with 60 square feet or 120, homeowners can apply specific strategies to stretch space without knocking down walls or blowing the budget. Here are seven practical ways to get it done.
Key Takeaways
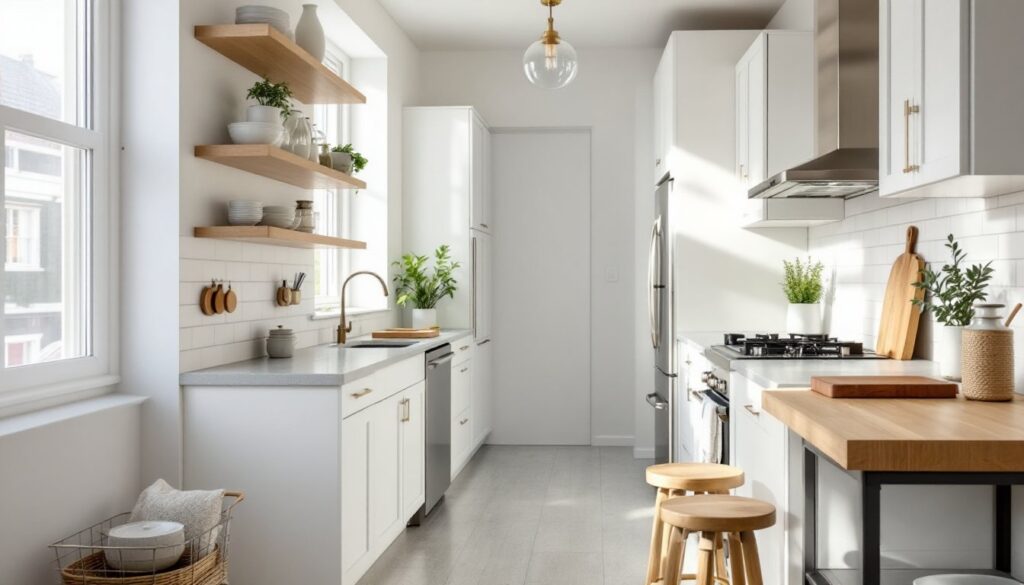
- Small open kitchen design eliminates visual barriers by removing upper cabinets or opening sightlines to adjacent rooms, making tight spaces feel significantly larger without requiring wall demolition.
- Smart storage solutions like pull-out corner units, toe-kick drawers, and floor-to-ceiling pantry cabinets maximize usable space while maintaining an open, uncluttered aesthetic.
- Light color palettes, semi-gloss finishes, and monochromatic schemes amplify natural and artificial light to enhance the perception of space in small kitchens.
- Layered lighting including recessed LEDs, under-cabinet task lights, and pendant fixtures creates depth and prevents dark corners that visually shrink rooms.
- A galley or L-shaped layout with 12–22 feet work triangle perimeter and at least 36–42 inches of walkway clearance ensures functional flow for one or two cooks.
- Multi-functional furniture such as rolling carts, wall-mounted fold-down tables, and backless stools preserve floor space while adding prep surfaces and seating without blocking pathways.
Why Open Layouts Work Perfectly for Small Kitchens
Open layouts eliminate visual clutter by removing upper cabinets on at least one wall or opening sightlines into adjacent rooms. This doesn’t mean sacrificing storage, it means redistributing it. When a kitchen shares space with a dining area or living room, the eye travels farther, making the cook zone feel larger than its actual dimensions.
Removing a non-load-bearing wall (after confirming with a structural engineer or contractor) can add immediate breathing room, but that’s not the only route. Simply replacing solid cabinet doors with open shelving or glass-front uppers creates transparency. For renters or homeowners not ready for demolition, this is a low-commitment alternative.
Open kitchens also improve traffic flow. In a traditional closed kitchen, one person at the stove can block access to the fridge. An open design with a clear path between zones lets two people work without bumping elbows. Just ensure there’s at least 36 inches of clearance in walkways, 42 inches is better if the kitchen sees regular two-cook use.
One caution: open layouts expose everything. Dirty dishes, countertop clutter, and grease splatters are visible from the living area. Homeowners who prefer a hidden mess should plan for closed lower cabinets and disciplined daily cleanup.
Smart Storage Solutions That Don’t Sacrifice Openness
Maximizing storage in an open kitchen means using every inch without creating visual walls. Base cabinets with pull-out drawers instead of fixed shelves make deep corners accessible and eliminate the black hole where mixing bowls disappear. Soft-close drawer glides (look for undermount models rated for 100+ pounds) handle heavy cookware without slamming.
Corner cabinets are notorious space-wasters. A lazy Susan or pull-out corner unit recovers that dead zone. Blind corner pull-outs cost more upfront but deliver 30-50% more usable storage than a static shelf.
Toe-kick drawers, shallow pull-outs installed in the 4-inch recess under base cabinets, are perfect for baking sheets, cutting boards, or flat lids. They’re easy DIY adds if the cabinet face frame allows it. Use full-extension slides rated for at least 75 pounds.
Pantry cabinets work better than walk-in pantries in small kitchens. A floor-to-ceiling unit (84 inches tall, 18-24 inches deep) offers serious storage in a narrow footprint. If space is tight, a pull-out pantry, essentially a 6-inch-wide vertical drawer, fits between the fridge and wall.
Vertical Storage and Wall-Mounted Options
Walls are underused real estate. Floating shelves (made from 1.5-inch-thick hardwood or steel brackets with ¾-inch plywood) mounted on studs hold everyday dishes and glassware within arm’s reach. Anchor into studs with 3-inch lag screws or toggle bolts rated for drywall. Each bracket should support at least 50 pounds.
Peg rails or slat wall systems offer modular hanging storage for utensils, pots, and cutting boards. These systems keep counters clear and items visible, which speeds up meal prep. Magnetic knife strips (18-24 inches long) free up drawer space and double as a design element when mounted on a tile backsplash.
Overhead pot racks work in kitchens with 9-foot ceilings or higher. Mount to ceiling joists with heavy-duty eye bolts, and ensure the rack hangs at least 72 inches above the floor to prevent head-knocking. For lower ceilings, wall-mounted racks or a simple S-hook bar above the range are safer bets.
Choosing the Right Color Palette to Enhance Space
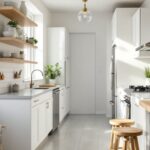
Light colors reflect natural and artificial light, making walls recede and ceilings appear higher. White, off-white, pale gray, and soft beige are proven space-stretchers. Semi-gloss or satin paint finishes bounce more light than flat finishes and are easier to wipe down, critical in a kitchen.
Monochromatic schemes (one color in varying shades) eliminate visual breaks. Paint walls, trim, and cabinets in the same light neutral to blur boundaries. This works especially well when cabinetry and walls meet without a strong contrast line.
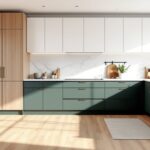
Dark colors aren’t off-limits, they just need strategy. A single dark accent wall (navy, charcoal, deep green) can add depth if the other three walls and ceiling stay light. Dark lower cabinets paired with white uppers or open shelving create grounding without closing in the space.
High-gloss cabinet finishes amplify light but also show fingerprints and dings. Matte or satin finishes are more forgiving and still read as clean. For DIYers painting existing cabinets, use a bonding primer (like Stix or INSL-X) followed by two coats of urethane-fortified paint or a separate topcoat for durability.
Backsplash color matters too. Large-format tiles (12×24 inches or bigger) in light tones or reflective materials like glass subway tile keep sightlines uninterrupted. Avoid busy patterns or dark grout that chops up the wall.
Layout Strategies for Maximum Flow and Functionality
The classic work triangle, sink, stove, fridge, remains a sound principle, even in compact spaces. Keep the total perimeter between 12 and 22 feet. Less than 12 feels cramped: more than 22 wastes steps. In small kitchens, a galley or L-shaped layout often delivers the tightest triangle.
Galley kitchens (two parallel runs of cabinets) excel in narrow footprints. Maintain at least 42 inches between facing cabinets if two people cook regularly: 36 inches works for single-cook households. Place the sink and stove on one side, fridge on the other, to avoid crossing traffic mid-recipe.
L-shaped layouts tuck into corners and open to adjacent rooms naturally. Position the sink at the corner (with a corner sink base or standard cabinet) to anchor plumbing. Place the range on one leg of the L, fridge on the other. This setup leaves the open side available for a small table or stools.
U-shaped kitchens offer maximum counter and storage in small square or rectangular rooms but can feel closed off. To maintain openness, leave one leg of the U shorter or replace upper cabinets with open shelving ideas to avoid a tunnel effect.
Counter depth matters. Standard base cabinets are 24 inches deep with a 25-inch countertop overhang. In very tight spaces, consider 18-inch-deep cabinets on one wall to preserve walkway width, just confirm appliance specs, as some ranges and dishwashers need the full 24 inches.
Lighting Techniques That Open Up Your Kitchen
Layered lighting, ambient, task, and accent, prevents dark corners that shrink a room visually. Start with overhead ambient lighting: recessed LED cans (4-inch or 6-inch) spaced 4-6 feet apart, or a flush-mount or semi-flush ceiling fixture rated for damp locations.
Under-cabinet lighting is non-negotiable for task work and adds a floating effect to cabinets. LED strip lights or puck lights installed on the underside of wall cabinets illuminate counters without glare. Hardwire them to a wall switch or use plug-in versions with an in-line dimmer. Aim for 300-500 lumens per linear foot of counter.
Pendant lights over a small island or peninsula provide focused task light and visual interest. Hang them 30-36 inches above the counter (measured from the bottom of the fixture to the surface). In kitchens with 8-foot ceilings, mini pendants (8-12 inches in diameter) prevent head-bumping.
Natural light is the ultimate space-expander. If the kitchen has a window, skip heavy curtains. Use sheer roller shades or café curtains that let light through while maintaining privacy. Reflective surfaces, glossy backsplash tile, stainless appliances, polished countertops, bounce daylight deeper into the room.
Dimmer switches (compatible with LED bulbs, check packaging) adjust lighting for cooking, dining, and cleanup. Install on all circuits except those powering hardwired appliances. Most standard toggle dimmers swap in with basic electrical knowledge, but if the home has older wiring or no ground, hire a licensed electrician.
Multi-Functional Furniture and Island Alternatives
A full-size island (minimum 4 feet long by 2 feet deep) rarely fits a small kitchen without blocking pathways. Instead, consider a rolling cart or narrow console table (30-36 inches long, 18 inches deep) that provides prep space, storage, and flexibility. Locking casters let it move for cleaning or open up floor space when not in use.
Drop-leaf or fold-down tables mounted to a wall or cabinet end serve as eat-in spots or extra prep surfaces. When folded, they take up less than 3 inches of floor space. Support brackets rated for the table’s span (usually 150-200 pounds for a 24×36-inch leaf) attach to wall studs or blocking.
Backless stools or chairs tuck completely under counters and tables to free up circulation. Look for seat heights 10-12 inches shorter than the counter, counter height (36 inches) pairs with 24-26-inch stools: bar height (42 inches) needs 30-32-inch stools.
Open-base carts and tables prevent the boxy, heavy look of solid cabinetry. Wire shelving, slat shelves, or metal frames keep sightlines clear. For small kitchen design ideas, mixing materials, wood top, metal base, adds texture without clutter.
Wall-mounted fold-down desks or breakfast bars create dining or workspace on demand. Install them along a short wall or at the end of a run of cabinets using heavy-duty folding brackets (rated for the expected load). Finish with a 1.5-inch hardwood or butcher-block top for durability.
Avoid furniture with thick legs or skirts that visually weigh down a room. Slender profiles and elevated bases (6-8 inches of clearance underneath) maintain the illusion of open floor space.