Transforming a kid’s bedroom isn’t just about choosing cute wallpaper or throwing in a bean bag. It’s about creating a space that actually works, for sleep, play, assignments, and the inevitable toy tornado. The good news? Most of these projects fall well within DIY territory, don’t require structural changes, and won’t expensive. Whether a child is three or thirteen, a thoughtfully designed bedroom can adapt without needing a full gut-job every two years. This guide covers practical design strategies that parents can carry out using basic tools, off-the-shelf materials, and a weekend’s worth of effort.
Key Takeaways
- Kids bedroom design ideas should prioritize neutral base colors with removable accents through textiles and artwork, allowing flexibility as children’s tastes evolve.
- Use modular storage solutions like cube organizers and under-bed drawers that adapt from toddlerhood through high school without requiring frequent overhauls.
- Create functional zones within the room using furniture placement, rugs, and lighting to separate sleep, play, and study areas even in small spaces.
- Furniture anchoring and cordless window treatments are non-negotiable safety measures that prevent tip-over injuries and strangulation hazards in kids’ bedrooms.
- Budget-friendly DIY projects like floating shelves, pegboard walls, and window seats deliver visual impact for $75–150 without professional installation.
- Choose broad themes like adventure or nature rather than character-based designs, and use removable elements like wall decals and bedding to avoid costly redesigns as interests change.
Choosing the Right Color Scheme for a Kids Bedroom
Paint is the easiest variable to control and the hardest to undo if done poorly. Skip the high-saturation primaries that look great in a catalog but overwhelming at bedtime. Instead, use neutral base colors on the largest surfaces, walls, ceiling, and built-ins, then layer in brighter accents through textiles, artwork, and removable elements.
Light grays, soft beiges, or muted blues provide flexibility as tastes change. One gallon of quality interior latex covers roughly 350-400 square feet with one coat: most kids’ bedrooms need two gallons total for two coats. Use a low-VOC or zero-VOC paint to minimize off-gassing, especially important in smaller rooms with limited ventilation.
For accent walls, consider peel-and-stick wallpaper or a single painted feature wall. These allow for a pop of pattern or color without committing every surface. If painting a bold color, test it with a sample quart first, paint looks different under natural light versus overhead LEDs.
Avoid glossy finishes on walls. Eggshell or satin sheens clean easier than flat paint but don’t highlight every ding and fingerprint the way semi-gloss does. Save semi-gloss for trim and doors where durability matters most.
Smart Storage Solutions That Grow with Your Child
Kids accumulate stuff at an alarming rate, and most bedrooms don’t have enough closet space to handle it. The solution isn’t more plastic bins, it’s better-designed storage that adapts as needs change.
Modular cube organizers (like the common 13-inch cube systems) work from toddlerhood through high school. They’re easy to assemble, don’t require anchoring to studs for stability when kept low, and can be reconfigured or stacked as the child grows. Pair them with fabric bins for toys early on, then swap to open cubes or baskets for books and sports gear later.
Under-bed storage is often wasted space. Measure the clearance first, most beds sit 10-12 inches off the floor. Rolling drawers or shallow bins on casters make use of this area without requiring daily gymnastics to access. If building a bed frame from scratch, design it with this in mind: a simple platform frame using 2×6 or 2×8 lumber can incorporate pull-out drawers underneath.
Wall-mounted solutions like floating shelves or pegboards keep the floor clear and make cleaning easier. When installing shelves, locate studs with a stud finder and use appropriate anchors. A single 1×8 pine or poplar shelf mounted on heavy-duty brackets can hold books, trophies, and display items. Pegboards offer ultimate flexibility, hooks and bins can be moved without new holes.
Closets benefit from adjustable shelving and double-hang rods. A child’s clothes don’t need the same 60+ inches of vertical clearance adults do. Install a second rod at 40 inches to double hanging capacity, then raise it as they grow. Many homeowners find interior design strategies that prioritize adaptability reduce the need for frequent overhauls.
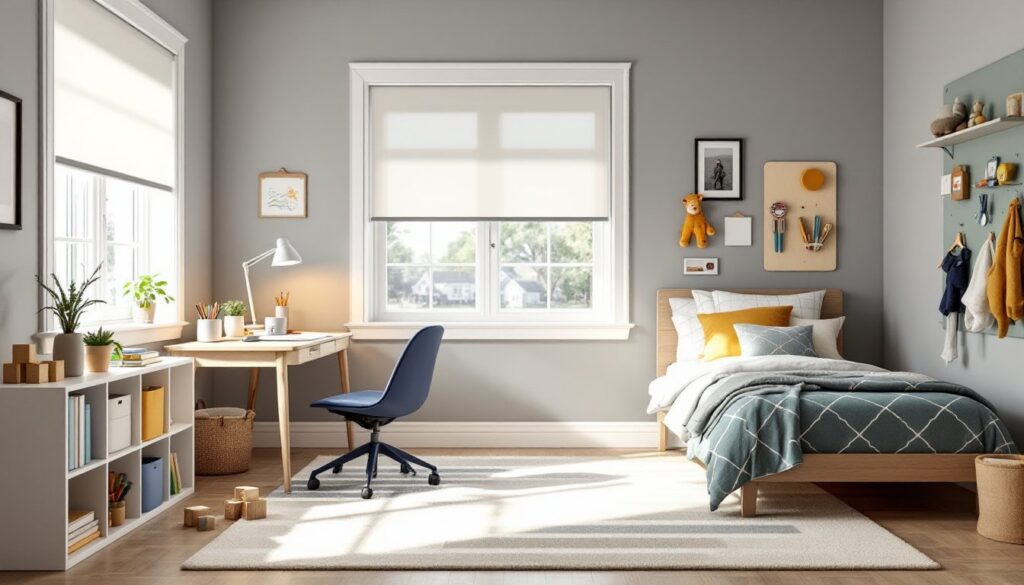
Creating Functional Zones for Sleep, Play, and Study
Even small bedrooms benefit from defined zones. This doesn’t mean building walls, it means using furniture placement, rugs, and lighting to create psychological separation between activities.
Start by placing the bed against a solid wall, away from windows if possible. This minimizes drafts and reduces distractions. If the room is shared, position beds on opposite walls or use a bookshelf as a visual divider. Avoid blocking HVAC vents or windows that serve as emergency egress (check local IRC codes, most require one operable window or door for bedrooms).
The play zone should be in the most open area, typically near the center of the room or away from the bed. A low-pile rug or foam play mat defines the boundary and makes cleanup easier, blocks and small toys don’t roll under furniture as easily. Keep this area flexible: what’s a train table at five becomes a charging station for electronics at fifteen.
For the study zone, natural light is ideal. Position a desk near a window if possible, but not directly in front of it, glare on screens is a problem. A simple desk made from a birch plywood top (¾-inch thickness) on adjustable-height legs or filing cabinets grows with the child. Pair it with a task light and an ergonomic chair.
Lighting ties these zones together. Use a dimmable overhead fixture for general illumination, a bedside lamp for reading, and focused task lighting at the desk. LED bulbs are safer than incandescents, they stay cool and use a fraction of the energy. Install dimmer switches if the overhead is hardwired: most are DIY-friendly and don’t require an electrician unless replacing a three-way switch setup.
Budget-Friendly DIY Kids Bedroom Projects
Most kid-focused bedroom projects don’t require advanced skills or expensive tools. Here are a few that deliver solid impact without the price tag of custom furniture.
Built-in window seat with storage: If the bedroom has a window with wall space on either side, frame out a simple bench using 2x4s for the base structure and a ¾-inch plywood top. Add hinges to create a lift-top for storing off-season clothes or extra bedding. Finish with paint or stain, then top with a foam cushion cut to size and covered in durable fabric. Total material cost typically runs $75-150 depending on lumber prices.
DIY pegboard tool or art wall: A 4×8-foot sheet of ¼-inch pegboard costs under $20. Cut it to size with a circular saw (wear a dust mask, MDF pegboard creates fine particles), paint it to match the room, and mount it using 1×2 furring strips as spacers so hooks have clearance. This works for art supplies, sports equipment, or collections. The layout can change weekly without new holes in drywall.
Floating corner shelves: Dead corner space is common in kids’ rooms. Build triangular floating shelves using 1×10 or 1×12 boards cut at 45-degree angles. A miter saw makes clean cuts, but a circular saw with a guide works too. Secure them to studs in both walls using hidden brackets. These hold books, stuffed animals, or small plants without taking up floor space.
Chalkboard or magnetic paint accent wall: A quart of chalkboard paint covers about 100 square feet and turns any smooth wall into a drawing surface. Magnetic primer (apply two coats before the chalkboard layer) adds functionality but requires more coats to be truly magnetic. Sand lightly between coats for best adhesion. Many modern interior design ideas emphasize interactive elements like this that engage kids without requiring permanent installations.
Safety Considerations and Child-Friendly Materials
Kids’ bedrooms require extra attention to safety, particularly for children under ten. Many DIY projects can inadvertently introduce hazards if not planned carefully.
Furniture anchoring is non-negotiable. Dressers, bookcases, and anything over 30 inches tall should be secured to wall studs using furniture anchors or L-brackets. Tip-over accidents are a leading cause of furniture-related injuries. Use a stud finder, drill pilot holes, and secure with appropriate screws, typically #8 or #10 wood screws at least 2½ inches long into studs.
Avoid furniture with sharp corners or retrofit existing pieces with corner guards. When building, round over edges using a router with a ⅜-inch or ½-inch roundover bit. Sand all surfaces to at least 120-grit smoothness.
Window treatments should be cordless. Corded blinds pose a strangulation risk. Cordless cellular shades, roller shades, or curtains on a fixed rod are safer alternatives. If the room is on an upper floor, ensure windows have stops or guards that prevent them from opening more than 4 inches (check local codes, requirements vary).
Material selection matters. Choose low-VOC paints, stains, and finishes. Water-based polyurethane is safer than oil-based for DIY furniture projects. Avoid treated lumber indoors unless it’s newer ACQ or CA-treated material, and even then, it’s overkill for interior use, stick to standard pine, poplar, or plywood.
For flooring, low-pile carpet or vinyl plank is easier to clean than high-pile or shag. If installing luxury vinyl plank (LVP), choose products labeled phthalate-free. Many parents consider child-safe design choices when selecting finishes and materials to minimize long-term exposure to off-gassing or allergens.
PPE reminder: When cutting, sanding, or painting, wear safety glasses, a dust mask or respirator, and gloves. Even “non-toxic” materials produce dust and fumes that shouldn’t be inhaled in quantity.
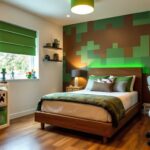
Themed Bedroom Ideas That Won’t Require Frequent Redesigns
Themed bedrooms are fun in theory but a headache when interests shift from dinosaurs to soccer to anime in the span of eighteen months. The trick is choosing themes broad enough to evolve without a total redo.
Instead of character-based themes (which age out fast), go with concepts: adventure, nature, space, or art studio. These allow flexibility. An adventure theme works with maps, globes, and vintage travel posters, all of which transition well into teen years. A nature theme supports greens and browns, botanical prints, and wooden accents that don’t scream “toddler.”
Use removable elements for the most theme-specific touches. Wall decals, bedding, and curtains are easy to swap. Keep built-ins and paint neutral. A well-planned interior design approach treats the theme as a layer, not the foundation.
Gallery walls let kids display their interests without committing to a single motif. Use matching frames (IKEA Ribba or similar) in a grid layout for a cohesive look. The art inside can change as often as needed. Hang frames using a level and painter’s tape template to avoid extra holes.
For older kids and teens, consider an industrial or minimalist aesthetic. Exposed shelving, metal accents, and monochrome palettes feel mature but not sterile. Add personality through posters, string lights, or collections. Black iron pipe makes surprisingly sturdy and affordable shelving brackets when paired with reclaimed wood or stained pine boards.
Themed lighting can add flair without permanence. String lights, neon signs, or a unique pendant fixture (installed by a licensed electrician if hardwired) bring character. Battery-powered LED strips avoid electrical work entirely. According to design resources, lighting changes are among the easiest ways to refresh a room’s vibe without repainting or replacing furniture.
Conclusion
Designing a kid’s bedroom doesn’t have to be complicated or expensive. Focus on durable materials, flexible storage, and design choices that adapt as children grow. Most of these projects require only basic carpentry skills and common tools. With thoughtful planning and a willingness to do the work, parents can create spaces that are functional, safe, and personal without hiring a contractor or interior designer.